Advanced Server Options: Laserfiche
In this tab of the Advanced Server Options dialog box, you can specify whether Workflow will use SSL when connecting to Laserfiche.
To allow Workflow to use SSL
- Select the Advanced Server Options node or any server details in the center Details Pane.
- Click Properties in the Actions Pane, or right-click and select Properties.
- Select the
 Laserfiche tab of the Advanced Server Options dialog box.
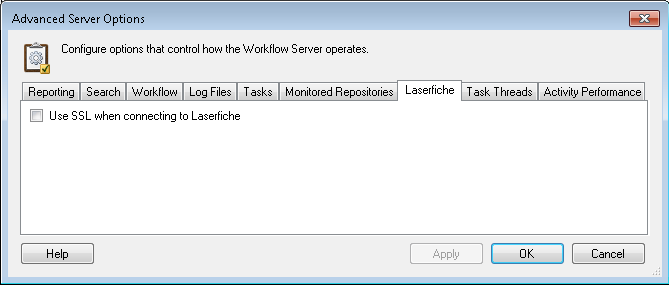
- Select Use SSL when connecting to Laserfiche to use SSL to secure network communications when connecting to Laserfiche. You must have your Laserfiche Server setup to use SSL for this option to work.
Note: This setting will affect the Workflow Server's connections, the Workflow Administration Console's connections, and, after being restarted, the Designer's connections to Laserfiche. Because the Workflow Server applies the SSL settings to the programs it is connected to, your Workflow connection profiles will have to specify repositories by using their fully qualified domain name.
Note: You must restart the Workflow Subscriber Service for this setting to apply.
Configure the Workflow Server to use SSL when connecting to an encrypted Laserfiche Server
- Ensure your Laserfiche Server is configured for SSL. Learn how to configure Laserfiche to use SSL.
- Ensure Workflow is configured to use SSL when connecting to the Laserfiche Server. See steps above.
- Run the Microsoft Management Console (MMC) and import a valid x.509 certificate into the Local Computer's certificate store (Trusted Root Certificate).
Note: The certificate used must be the same certificate as used when configuring the Laserfiche Server.
- Open the Registry Editor by running regedit.exe.
- Navigate to HKEY_LOCAL_MACHINE\SOFTWARE\Laserfiche\Client8\Profile\IPDatabase. The path is "Client8" even if Laserfiche 9 is installed.
Note: If the Client file is not present, you must create it.
Note: If your machine is x64, the registry path is HKEY_LOCAL_MACHINE\SOFTWARE\Wow6432Node\Laserfiche\Client8\Profile.
- Create a string value with the name of your repository and its domain name as the value data.
- Select the key you want to add a string value to. Right-click in the viewing pane, point to New, and select String Value. Type the name of the repository as the string value.
- Double-click the RepositoryName string value to open the Edit String dialog box. In the Value data field, type in the Laserfiche Server's fully qualified domain name.
-
Navigate to HKEY_LOCAL_MACHINE\SOFTWARE\Laserfiche\Client8\Profile\RepositoryName. The path is "Client8" even if Laserfiche 9 is installed.
Note: If your machine is x64, the registry path is HKEY_LOCAL_MACHINE\SOFTWARE\Wow6432Node\Laserfiche\Client8\Profile.
- Create a string value named UseSSL.
- Double-click the string to open the Edit String dialog box, and change the Value data to yes.